Here's a shot (above) of the glam, new chandelier that I got at the Chicago show. Ain't it purty? It was made by Gerri DeCave, with whom I spent a highly entertaining half-hour (at least)! getting the 4-1-1 on all the behind-the-scenes goings-on. Of course my crap photo doesn't do the chandelier justice at all!
In addition to magnificent, sparkly baubles for your dollhouse ceilings, Gerri specializes in re-vamping off-the-shelf Bespaq furniture, giving her pieces her signature, high-end flair. All of her drawers are lined in lovely papers, (so naturally, when I got home, I had to do the same)!
And here's the Stokesay Ware pattern I'm collecting...they only had one plate left in my pattern in Chicago --which was probably lucky for my wallet!
I guess you can't really tell that I lined the silverware drawer with fancy paper from Brodnax Prints. The drawer is a tad disorganized --it looks rather like my 'RL' drawers, LOL!-- perhaps I should make dividers for the various utensils?
Candle tipped over in the background. Ugh!
I picked up this perfectly adorable hat from The Doll's Cobbler, a.k.a. Sylvia Rountree. Mere moments before stumbling across Sylvia's cute-as-a-button booth at the Chicago show, I had procured a hatbox just down the isle --so naturally I required a hat to go in the box, right? Well, the hat has ended up on the Entrance Hall table, not in the hatbox, where it tragically would not even be seen --duh! (The hatbox is in the Master Chamber, but that's another post)...
There's already a speck of dust on my new hat :(
Perhaps here you can see the newly-papered drawer holding a pistol? (above) You know us Americans --we always have loadedfirearms lying here and there about the house. Note also the added flourish of a tasseled key. Because you can't have a deadly weapon without a fabulous, hand-made tassel. Yes, darlings, I made the tassel with my own two hams --er, I mean hands (no small feat with my definitely undainty digits)...
NEXT WEEK: The Bedchamber REVEALED!!! (If the rest of my stuff gets here).
This week's music video is in honor of the --finally-- hot, sticky, summer weather we're having --YAY! Enjoy it with a refreshing ice cream treat while you leave a comment!
Well, your humble reporterfinally reclaimed his camera, so I thought I would show you the lovely, black and gold urns that Sophia from Small Talk gave me at the Chicago show. They're simply di-voon and I love that the little lids are removable!
Sorry that I've been sort of MIA the past few weeks. Life certainly has it's ups and downs, right? You do understand? Of course, you do.
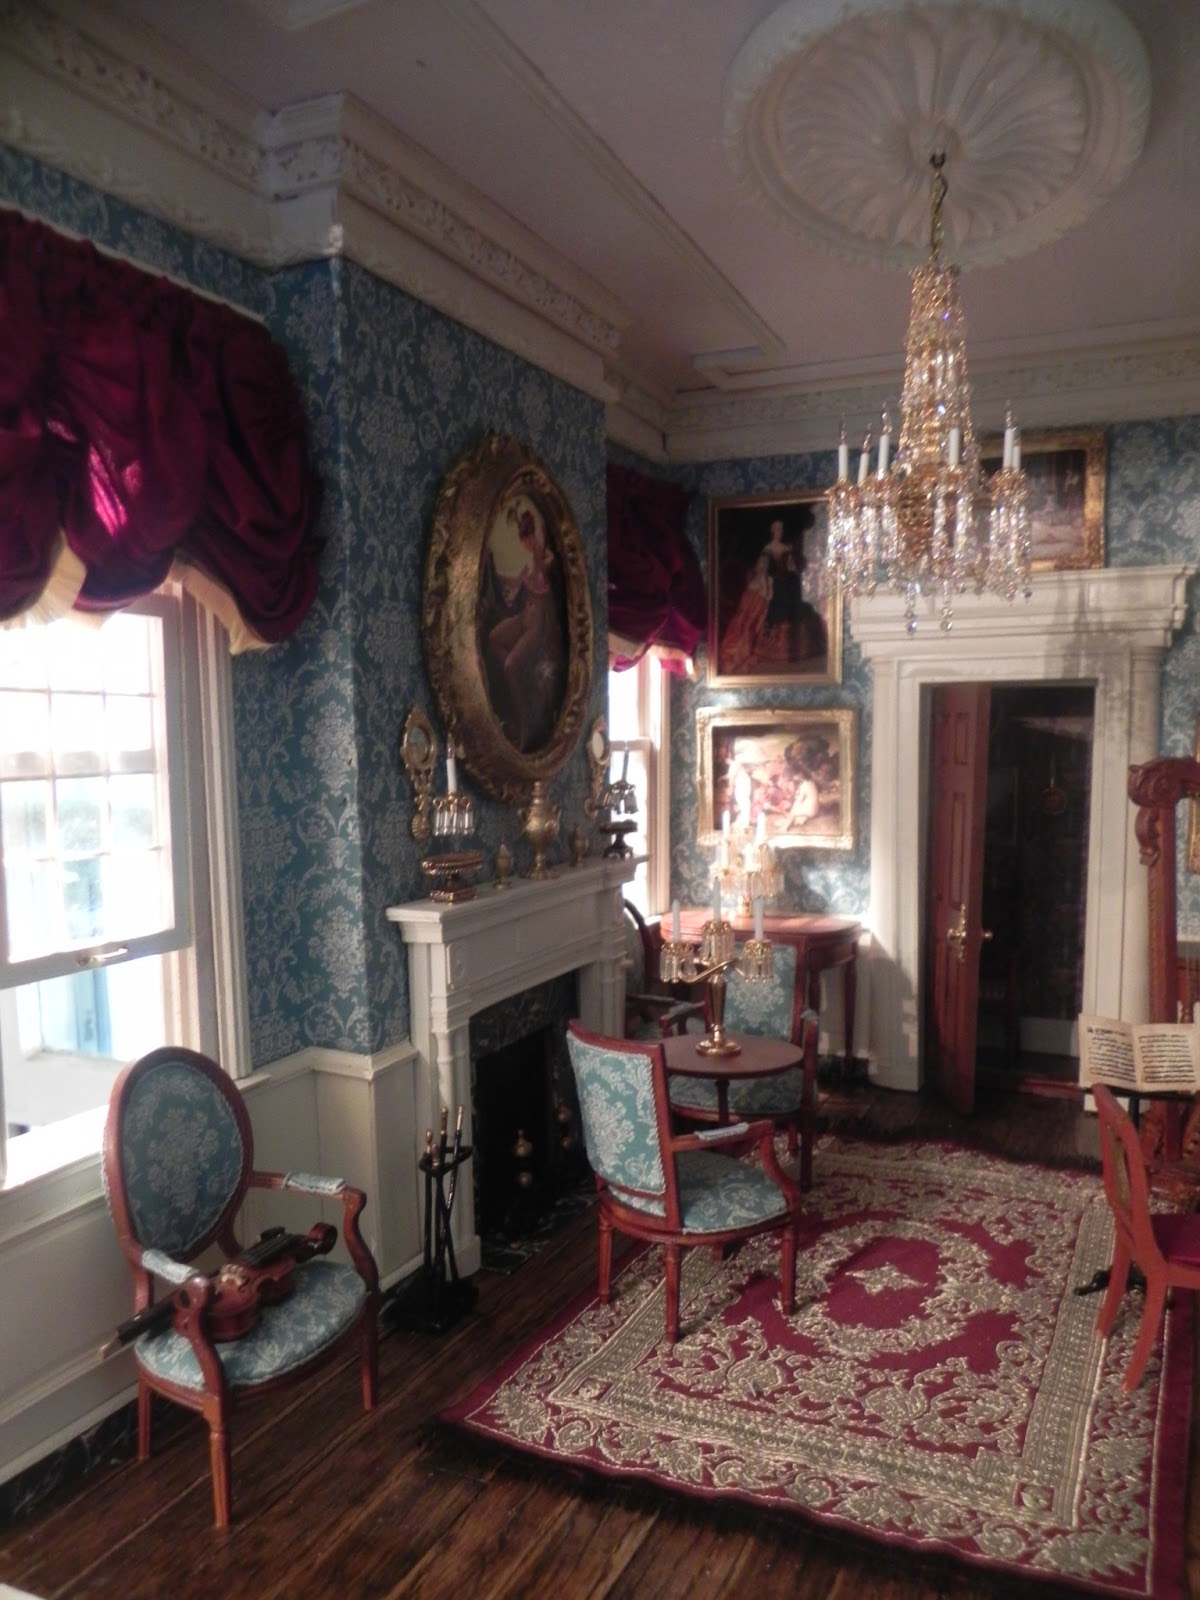
On the mantle are the new clock and trophies from David Iriarte. (I should probably take a better photo of them that will do them some justice)! To the right of the fireplace is a firescreen I made from a House of Miniatures kit. Actually, it's two kits because the screen came with a square panel and I replaced it with an oval one. No, mes chers, I'm afraid I did not paint the floral image --I could probably have pulled it off in 'real scale,'-- but I don't have the patience (nor the expertise) for that sort of work and so I decoupaged it.
BTW, Forgive me for not lately commenting on your blogs...I'm afraid I'm dreadfully behind and I amdesperately trying to catch up!
It's been nothing but rain, rain, rain here in Minneapolis --but the sun somehow managed to peek out for approximately five minutes today so I snatched the op to snap these few photos. Did I mention that I am absolutely coo-coo for those urns?
Coming up: the Master Bedchamber, revealed! But first, in honor of Marisa from Steinworks: a MUSIC VIDEO!
Oh. My. God. I'm still processing the whirlwind experience that was the Tom Bishop International. I thought last year (which was my 'first time' --and you know what they say about the first time) was incredible, but this year proved to be even more enthralling!
I know I'm terribly late in reporting on the show, but I left my camera down in Chicago --not that there were any photos on it anyway-- my blasted charger stopped working for some reason, so I wasn't able to snap many pics at all! Hence the delay...
Our trip to the Windy City almost didn't happen due to yet another freakish, late-season snowstorm. Yes, mes chers, you read that correctly! Snow. In April.Late April.
Was I going to allow the likes of Old Man Winter to keep me from driving eight hours in order to purchase Gorgeous Little Things? Oh, hell, no! Even the fact that the snow plows had missed our alley (where the car was parked) did little to deter your Intrepid Reporter...though the snow bank that the plows had deposited at the end of said alley did manage to jar lose some kind of thingamajig under the car. We had to listen to whatever it was dragging all the way to Eau Claire, Wisconsin, where it thankfully fell off. Our little gift to you, Eau Claire!
This was the view on the way out of Minneapolis...good riddance! Hopefully it will all melt by the time we get home!
photos courtesy of the local news.
Ugh! So the first leg of the trip was, shall we say, nasty? Fortunately, by the time we lost the aforementioned thingamajig, the snow eventually gave way to green grass --and even a few daffodils! Things were looking up!
We arrived in Chicago Friday afternoon at our friend Roland's tastefully-appointed, Rogers Park condo. I haven't seen dear Rol in ages, but as it often goes with old friends, we all quickly fell into our accustomed camaraderie. After an evening of delicious food, scintillating conversation --and copiousamounts of martinis-- it was off to bed. And even though the excitement for the next day's event was building to a colossal crescendo I quickly dozed off, while visions of GLT danced in my head!
THE SHOW!
We arrived at the show just as it was opening at ten o'clock. Oops!Mr. Moneybags forgot to visit the cash machine, not-so-conveniently located at the other end of the hotel. By the time we returned to the ticket counter, the line stretched all the way down the hall. I noted that, though your Humble Reporter is himself, nospring chicken, he seemed to be the youngest miniature enthusiast in attendance. This doesn't bode well for the future of the miniatures hobby!
Tickets finally in hand, I took a deep breath and waded in! Where to look first? These were among the finest miniaturists in the world, all competing for your attention!
I was only in a few short minutes before I started bumping into and catching up with friends likeErik Goddard, who is also from hometown Minneapolis. Eric makes the most marvelous room boxes and scale models in all manner of styles and I especially like his take on modern design. It was great to catch up with Erik and see his latest and greatest work, which you can check out for yourself on his blog.
At the sage advice of Andy, I made a very specific HotList of items to shop for, the main thing being a glam chandelier to replace the one in the Music Room. I found a particularly gaw-jess one at the booth of DeCave Designs, where I spent an amusing half-hour (at least) talking to the Devine Ms. DeCave herself, Gerri. Gerri turned out to be a kindred spirit because not only does she create the most spectacular chandeliers, but she takes ordinary Bespaq furniture and gives it a marvelous, signature DeCave re-vamp. Faux bois, faux marble --Gerri does it all with particular panache and a fine eye for the slightest detail, like mini silk tassels on all her drawer pulls. Check out her website and Etsy shop.
While I was dishing the dirt with Gerri, my better-half was busy next door canoodling with another dish, namely David Iriarte, a very young and very charming, talented, young, --(did I mention he was very young)? furniture maker from Spain. David makes finely-crafted pieces in the manner of the seventeenth and eighteenth centuries, and though he spoke nary a word of English, dove-tailed drawers speak for themselves, darlings! My better-half, I daresay , was not the least bit interested in joinery a l'antique, and though exquisite, Louis Quinze furniture was decidedly not on my HotList, David had some rather lovely mantle clocks and other tchotchkes available which fortunately fit into my budget (if not my HotList). And so your Intrepid Reporter picked up a few, miscellaneous nic-nacs. Flexible, mes chers, is my middle name!
I have been stalkingMartha McLeana la distance for quite some time. She makes the most stunning, miniature floral arrangements in the biz. As a former, floral designer, I knows me a tasteful arrangement when I see it and Martha, (as Marge Simpson would say), simply screams good taste. Understated eleganza is Martha's forte and I just had to have something from her booth, though it was not technically on myHotList, either! (Thank gawd I'm so damned flexible)! I can't wait to show you her little bud vase of daffodils, sitting on the windowsill of the bedchamber. Martha also has a great blog to peek at, too.
Right next to Martha's booth was my BFF Sophia of Small Talk. It took me a while to find Sophia's booth because --well-- she is rarely there, lol! Thank god her friend, Emily, whom I remembered from last year, was on hand to greet me! While having a perfectly lovely chit-chat with Emily, Sophia eventually showed up, after completing an epic shopping excursion of her own. Girl after my own heart! Sophia always knows the T of the show and after finding out that I was on the hunt for dinnerware she guided me over to the Spokesay Ware booth.
I had already blown my wad on the chandelier, and so perhaps it was fortunate that the Spokesay booth had already nearly sold out of the china pattern I was interested in. Divine intervention?You decide. Still, I was able to snap up a dinner plate bordered in the Greek key pattern I so admire. And at least now the huz knows what to get me on birthdays and anniversaries, right? I mean besides sweatpants.
Yes. Really. Sweatpants.
Also on my HotList: pillows for the bedroom window seats! I scoured the show from top-to-bottom but could not find anything in my color-scheme of Dijon-mustard yellow and black Oh wells, I did find some mini fabric I can fashion into my own cushions --though I had my heart set on needlepoint.
It was about this time that I ran into the legendaryRay Whitledge. How can I even explain the experience? I've been blog-buddies with Ray for ages, but here was the Real Deal! For me, I guess it was like a comic book geek running into Batman or Superman! --or the guy who invented Batman and Superman?-- well, you get what I mean. Only it wasn't like that at all. I wasn't tongue-tied, or nervous, or anything, because Ray is so cool, I felt like I was talking to my bestie the second I met him!
My history with Ray goes back to when I was trying to wire my first room and was having a hard time with it. Ray sent me his email address and offered to help. I had no idea he was a famous miniaturist! Yet he took the time to give me, a mere beginner, the encouragement I needed (I was on the verge of giving up) and eventually, I got my room lighted. Sometime later I found out (thanks, Giac) who Ray was and OMG was I bowled away that someone like him would take pity and give the likes of me basic, introductory lighting lessons. I will always be so indebted to Ray for taking the time to give a newbie a little push. Ray, did you ever know you were my hero and that you are the wind beneath my wings?
Well anyway, at the show, Ray tipped me off to artistLorraine Scuderi, for the aforementioned pillows I was relentlessly searching for. Unfortunately, Lorraine had no pillows in my rather odd colorway, though she did have a hatbox --which conveniently fell into the 'bedroom accessories' category on my HotList.
So I had a hatbox , but it just seemed so --so empty! Fortunately, a few booths down, I ran into The Doll's Cobbler, who had a whole mini hat rack, chock-full of hats! YAY! My newly-acquired hat now fit perfectly into my newly-acquired hatbox.
We had another lively chat with artisan Sylvia Rountree, who like us is coo-coo for all the jazz-age greats! Sylvia has actually met many of our American Song Book idols, like Rosemary Clooney, Tony Bennett, et al and we had a lovely time comparing notes on all things jazz! Sylvia eventually shooed us off, as time was passing fast, but not before bestowing a cunning pair of shoes as a gift for the boys of Merriman Park. Wait til you see them --they are too cute for words! Thank you so much, Sylvia! I will cherish them, forever!
We high-tailed it back to Ray's because I wanted so much to spend a little more time in his company...unfortunately, as I approached Ray's booth for a second time, the ballroom lights were shut off! Last call! We had little more time than to exchange phone numbers and murmur our parting good-byes: Adieu, new, old friend!
But I had one more item on my HotList... would we make it back to the booth in time?
The pair of urns I had my eye on were back in Sophia's booth, and when I pointed them out to her, as the lights grew dimmer, Sophia gifted them to me, the most lovely parting gift, ever! I can't thank you enough, Sophia! (And your urns look fantabulous in my Drawing Room)!
I left the show higher than a kite, hehe, no small coincidence since the show fell on 4/20, LOL! It was a major rush and I didn't even tell you the half of it. SO many, many artists, each displaying the very best of the best...The whole thing was so utterly inspiring! When I get my camera back I'll show you all my booty in situ.
Til then...have a lovely spring! (Or fall, for you southern hemisphere followers)...
XOXO,
John
P.S. Here's what we're now dealing with, weather-wise --kind of spooky!
This is what happens on a warm spring day in Minnesota when the lakes are still frozen!
Normally this time of year, I would be mucking about in the garden by now...but not this year! It's snowing again and this was the view out the back window when I woke this morning:
Too gruesome for words! Oh well, it's nice and cozy inside and my bedroom curtains aren't going to make themselves! So best to just buck-up and get to work, right?
They say it's best to use 100% natural fiber cloth for miniature projects because they're easier to manipulate. My other rooms have silk curtains and in the Bedchamber I decided to use cotton. I chose a bold, black & white stripe, because --well-- what can I say,I like stripes! I don't know if they would have paired this fabric with this wallpaper back in 1830 or so (the wallpaper has a subtle, stripe background) but stripe-on-stripe is all the rage nowadays, so I'm pretending my dolls are a little ahead of the game.
I found the pattern for my curtains in an old dollhouse book. Lo and behold: the pattern belonged to our ownRay Whitlege! He posted the same pattern on his blog a while back, if you would like to use it yourself.
I was a little concerned because the pattern called for it to be cut on the bias, which makes sense because fabric drapes more naturally when cut this way (think slinky, 1930's bias-cut gowns) but I want my stripes to go up and down --not at a 45 degree angle! So I was a little worried it wouldn't work. But all's well that ends well --the fabric draped properly, after all --Phew!
After cutting out the patterns I Fray-Checked the edges and then used Spray Starch to wet the pieces down. Next, I pinned it to some foam core on which I drew an outline of my window. It's just a matter of pinning and re-pinning until you're happy with the result. The tail section is simply folded over on itself to form the pattern. Once you like it just hit it with a blow-drier til set.
After trial & error, I found it easier to glue the trim to the edge of the curtain first, before starching and pinning. Eww!My hand looks like a sharecropper's!
Well, anyway...I made my fringe ala Jeffry by cutting a 1/2 " piece of ribbon in half, lengthwise, then pulling out threads to form the fringe. TIP: Grosgrain ribbon works better than double-faced satin! I wanted the fringe to have more 'heft' so I glued one piece to the front of the fabric then turned it over and glued another piece to the back edge.
I love this treatment because there's absolutely no sewing involved. A dab of fabric glue to hold the pleats in place is all it took, then glue the whole ensemble to a rod. It's that easy!
I used the same patterns to fabricate the pelmet which will go over the bed. I made the pelmet from a piece of resin molding that I heated up over a candle flame and bent it around a small tin can. I keep telling you: I'm pretty AND I'm smart!
Then it was on to the window seat cushions... I'm on a roll! To make those, I first cut out thin pieces of foam to fit the seats. Then I traced the foam patterns onto the back of the fabric. Add a 3/16" border around the outline and cut out, notching the corners.
Press the edges up on the lines. Set the bottom piece down and place the foam on top. Glue around all the edges and set the top pattern in place.
Use your fingers to press the two edges together. Then make an edge strip by cutting a long ribbon of fabric three times the thickness of the foam (1/2" in my case). Fold over in
thirds and press. Glue down the flaps. Run glue around the entire edge of the cushion and apply the edge strip, starting in the most inconspicuous corner.
Add piping to the edges by applying a thin line of glue over the seam and lying the cord on top, starting and ending in the most inconspicuous corner. I used my handy-dandy Crazy Cords machine to make my piping, but any appropriate-sized cording will do.
Look: striped and toil cushions on the chair, LOL!
Again: NO sewing involved! I'm now looking for a complimentary fabric for a few toss pillows...perhaps I'll find some at the ChicagoInternational? We're leaving in just a few days...OMG, my face! My hair! My nails!
Happy Spring! Woke up today to an inch of new snow on the ground with a wholefoot possible tonight! Oh wells, best just not to think about it --right?-- and dig in on the Bedchamber...
Because I changed my original plan and hung two chandeliers downstairs in the Library instead of one, I had to make a whole, new plank floor for my Bedchamber. But this gives me the opportunity to show you how I wired the chandeliers, since Elga and Fi are on that subject. (Sorry the photo is so blurry --I had to take it, one-handed)! Anyway, as you see I made small trap doors over the chandeliers and routed out a shallow 'junction box' to house the wires in case something goes awry --as it often seems to do. The traps are hidden under rugs and I like to pretend my dolls are in constant peril, LOL!Ray gave me the junction box idea back when I started wiring my first room, the Entrance Hall, its checkered, marble floor can be glimpsed to the bottom left. It's worked out great in all the rooms, so thanks a bunch, Ray!
And now, the fun part! after cutting the illustration board to fit all three walls (and doing several, careful 'dry fits' to make sure everything lines up), you can start decorating. I always start with the 'back wall.' I papered the illustration board panel with my toile wallpaper, which I'm absolutely coo-coo for. It was completely worth the six, long weeks I waited for it! I like to use Super 77 Spray Mount from 3-M for my wallpaper but I know some of you hate it! Here's a little tip: instead of cutting the paper to fit the panel, wrap it around the panel and secure with white glue in back. Not only will the paper never peel away, it finishes the visible edges off beautifully. The moldings are from the Lawbre Company, the skirting is an inch wide and makes an elegant statement in an otherwise plain room. The cornice, also from Lawbre, is a classic egg and dart design. I hung a picture frame molding about an inch and a half from the top of the wall and here is where I started the wallpaper. This leaves a nice, wide frieze at the top of the wall, which I decided to leave plain. Less is sometimes more! I already showed you the lovely door surround I made from bits of scrap. And I can never resist playing with artwork even at this early phase: the silhouette portraits are vintage 1950's pieces from an old, dismantled dollhouse.
The 'plain' wall across from the fireplace will have the bed placed here. Unfortunately, the skirting was ot long enough to make the span so I will have to do some filling and sanding at the joint. I use gesso (a mixture of white paint and white glue) for filling gaps. Here's another important tip: don't glue down any moldings permanently until you have dry-fitted them first --slip all your walls into your house and mark in the corners with a pencil where the moldings butt together in the corners. Make sure they match up preciselybefore gluing anything down! You will be constantly putting in and pulling out your walls --don't expect to get it all right in one try.
Here's the fireplace wall, under construction. The window seats are simply trimmed and I tried to unite all the different elements: windows, seats and mantle into one, cohesive composition I ran out of cornice in the upper left and so had to order another length! Don't you just hate that?
I remembered to take a photo of the hearth, under construction. It's all just illustration board and card bricks. I paint it up in scrumbled shades of grey.
It's all starting to come together! Here, I slipped the illustration board panels into the carcass of the house for another dry fit. Lookin' pretty good in the 'hood! I don't glue the cornice in til the very last thing because you want a tight fit with no gaps. The floor needs a few more coats of lacquer, some joints need filling and touching up...and then I can tackle the wiring!
ONLY A COUPLE WEEKS TIL THE CHICAGO SHOW...I"M GETTING SO EXCITED!!!
...And yet, your intrepid Reporter is pretending that spring has sprung, nevertheless busying himself with all the mundane, hum-drum tasks put off all winter --like cleaning! Still freezing outside? Who cares? Crank up the furnace, throw open the windows and let in some fresh, albeit frigid, air! Still a slushy layer of ice on the patio? (with a whole winter's-worth of frozen doggy-doo on top) A quick sweep of the shovel will take care of that. Yes, I know it's too early to hose it all down --Damn it, I DON"T CARE-- it's getting damned hosed, dammit!
And that rag-tag, sofa slip-cover that I've been meaning to redo forever? It's getting DONE. NOW!WITH PIPING!
Yes, it has been a virtual hive of Real-Life activitychez moi...I shan't rest until every last cobweb and dust bunny is banished from my sight! Of course, all this frenzied, dreaming of spring-induced OCD-ness means that life at Merriman Park has come to a bit of a stand-still.
Until yesterday, that is, when a long-anticipated package from the Lawbre company finally made its way to my doorstep. And so work on the Bedchamber can finally continue...
Hey! Anyone else going to the Chicago International miniatures show later this month? Drop me a message if you would like to catch a cup of coffee, or something!
Thanks a bunch for all the encouraging comments! They are like a tonic for my soul. You see, I tend to go rather into a tailspin this time of year, what with the weather in these parts being so incessantly and relentlessly drab, dismal and drear --not to mention harrowing-ly cold, cold, cold! Your intrepid Reporter almost forgot that he started his beloved Merriman Park in the first place to keep himself from committing hari-kari with an enormous Minnesota icicle. (Talk about Seasonal Affect Disorder)! I could snap one of the frozen daggers off my ice-dammed eaves and end it all right now, darlings, but then my mini bedroom would never get finished...Quelle tragédie!
So instead, I'll spare you the histrionics and get on with the decorating...
I am often asked where I get my inspiration and ideas from and the answer is: I have no clue! I think my mind is sort of like an gi-normous sponge that sucks up anything and everything that has to do with architecture and design and so I have a catalog, of sorts, stored in my head that I can readily reference.
The most tangible inspiration for Merriman Park is undoubtedly my now dog-eared copy of The Thorne Rooms, which has somewhat become my 'miniatures Holy Bible!' Before starting any room, I inevitably revisit this sacred tome. To me, Mrs. Thorne was, and still is, the Gold Standard of Miniatures.
Seeing the Thorne Rooms at the Chicago Institute of Arts for the first time is what originally made me decide to build Merriman Park; and so revisiting the source inspiration helps keep me grounded and 'on point." (I am a Gemini, and we Air Signs need these sorts of crutches to stay focused)!
If you're like me, books, magazines, movies, plays, blogs... all provide fodder for future projects.
Once I get a few ideas in my head, I'm ready to plan the room. Sometimes, I'll draw up detailed plans...
...But most of the time, I have such a clear picture in my head that I don't bother with a drawing. In the case of my Master Bedroom, I'm forgoing any renderings for that reason. All the rooms of Merriman Park are similar in their basic lay-out in that they're all rectangular with a door on the 'back' wall and with a fireplace flanked by two windows on each side. To liven things up a bit, I varied the mill work in each room, adding arches here and wainscot there, and in the Master Bedroom, I decided to include built-in window seats
My plan (such as it is)! in place, it's time to begin... I don't know why, but I always seem to begin with the ceiling --I guess you have to start somewhere! As you probably already know, I use illustration board panels, cut to fit the walls, floors and ceilings of my rooms. I apply the trims and moldings, wallpaper, etc to these panels, and then install them into the room. The advantage to doing it this way is that you can work on a flat surface instead of trying to reach into your little dollhouse room. And the panels hide all the wiring, too!
After cutting a panel to fit my ceiling I penciled in where the fireplace chase hits. My plan for the ceiling is pretty straight-forward: a beautiful ceiling rose from Sue Cook Miniatures centered, and a simple molding to frame the room. I penciled in where the moldings were to go by measuring 1 1/2 inches from the wall all the way around. The moldings are cut with a mini miter box using forty-five degree cuts at the corners.
Once everything is glued down, I use 'spray gesso' as a primer. You can get it at an art supply store. I use spray paints whenever I can because it doesn't leave brush strokes --and it's really fast! Now is the time to sand down any rough spots and fill any small gaps with gesso, applied with a small brush.
Then it's a few light coats of what I have begun calling 'Merriman Park White,' which is simply an off-white spray paint that I used in practically every room.
All ready to install --just pop it in! Much easier than trying to fit all those little pieces onto the actual dollhouse ceiling!
That finished, I thought I'd try something a little more fun, so I turned my attention to the door surround. I do not own many fancy tools or gadgets, but by using stock moldings, strip wood and a mini miter box, you can come up some fancy designs of your own.
My design is based on classical motifs, you can find examples everywhere and once you see something you like it's all just a matter of breaking it down into parts.
I started with plain strip wood going around the door frame and then outlined it with stock panel molding. I found a teeny, half-round molding about the thickness of a toothpick and use it to outline the inside of the door frame.
Sitting on top of this is a block of wood, about 1/4" thick. I wrapped a dentil cornice around this block and used 'Victorian skirting' as a shelf on the very top. It's all smoke and mirrors: simple forty-five degree cuts but once everything is glued up I think it looks as good as my expensive, 'bought' surrounds.
Well, that's about it for this week. We're supposed to get even more snow tonight for St. Patrick's Day --last year it was an unseasonable 80 and I was in flip-flops and shorts...Ugh! California is looking better and better....
I love making things and have a huge interest in architecture --especially Renaissance, Baroque and Classical styles. This is my first dollhouse project which I intended to use as a diversion from the maddeningly long, Minnesota winters.


.jpg)


