We are experiencing sometechnical difficulties here at Merriman Park involving a nasty virus and your intrepid reporter's right eyeball. Needless to say, it's become rather unpleasant to try to do any computer work much less perform the subtle intricacies of miniatures! So I'm afraid I must go MIA for the time being.
Fear not, faithful Readers! It will take more than a bout of temporary blindness to keep this bitch down!
I look forward to catching up with everyone's blogs at a later date...til then, hope you all have a lovely holiday season!
Whew! It seems as if Halloween was just a few short days ago and here it is almost Thanksgiving! If you're worried that I'm going to torture you with another Top-Ten List of Pilgrim Dolls,fear not, beleaguered Readers, I shan't go there! My Library is coming along, however slowly...ugh! it's a long story but let me fill you in on what I've managed to accomplish.
First of all, I'm hooking up the lights and chandeliers. This is never an easy task for me and it inevitably involves lots of colorful cursing from your intrepid reporter as I fumble to hold onto those damned brass pins!
I decided the Library would have two chandeliers centered on the bookshelves. I'm not quite ready to build my own fixtures from jewelry findings --yet! (Some day, perhaps...) But to save a little ching, I revamped some 'stock' fixtures.
So here's one of the little chandeliers I picked up. It has tiny, gold chains you can just make out in my horrid photo. I removed these chains and replaced them with strands of glittering Swarovski crystal beads, which I think are much more glam than gold chain, don't you think?
There were extra beads so I added swags of them between the arms of the fixture --because a chandelier can never be too sparkly, right?
Here they are, sort of semi-installed. I accidentally broke one of the bulbs because I thought they were bi-pin and --duh!-- they are actually a screw-in type bulb and so instead of screwing the bulb in tighter when it turned itself off I fiddled with it and now I think the glass part of the bulb broke off from the little metal socket part. UGH! NOW how am I going to get it out???
So this is the sofa I have picked out...I had made a Chippendale-style camel back number from a kit and it turned out pretty well, but it just seemed a little --I don't know-- stodgy. My original plan was to make the Library a little old-fashioned, done up in an earlier Georgian style but when I put this sexy Recamier in place I was smitten!
Of course that means I have to go back to the drawing board on all the other furnishings and even the curtains I painstakingly Pretty-Pleated will have to be re-vamped, I'm afraid...but oh well, it's not a race, right?
Hey...if I don't see you, have alovely Thanksgiving holiday to all the American miniaturists out there in blogland...here's my favorite Thanksgiving clip (only a teensy bit scary, I promise)!
Finally, my Library components arrived in the mail today and I am able to get busy! Here are my door surrounds which I am using to frame my built-in shelving. I even got a few books today, too! All I have left to do is glue everything down and fill the gaps with gesso and then touch up the paint.
Here's how the shelving started out:
Shelves are probably one of the easiest things to build, furniture-wise. You just decide what size you want them to be --in my case, the size of the door surround, and build the little box.
As an afterthought, I decided to do a mahogany finish on my shelves. It would have been so much easier if I had finished the wood before assembly! Oops! At least I did not glue the back on, yet!
Here it is with the back and the decorative frame. That's the same skirting molding on the bottom which matches the same on the wainscot.
Here's the doorway, I'm giving the door the same mahogany treatment as the shelves...
And finally, here is the fireplace wall with my Braxton Payne 'Adam' mantlepiece. Yesterday all my 'glowing embers' --also custom-made for my narrow hearths by Braxton-- arrived in the post, so I'll be busy retro-wiring those into all the other finished rooms!
Pretty soon I will be able to install the Library walls! Got to break out the Pretty Pleater first and whip up some curtains...
That's about it for now...just wanted to thank everyone for their comments on my Halloween Top-Ten Scariest Dolls list...sorry if some of them have given you nightmares! But that reminds me:
SCARE-IFIC DOLL #5:Ideal's Tuesday Taylor!
AND her big sister, Tiffany Taylor... I only have them on the list because when I was about twelve or thirteen years oldI tried to switch up Tuesday Taylor's hair from blond to brunette or, more likely --the other way around-- and her entire, bi-colored scalp twirled off in my hand! And it wasn't even my own sister's Tuesday Taylor...it was my best friend's sister's Tuesday Taylor! ...If it had been one of my sister's Tuesday Taylors, I would have just LOL'd, but I was at my friend's house, it was his sister's Tuesday Taylor and I was completely horrified! ("Dude...why you playing with my sister's doll?") I tried oh god how I tried to snap the scalp back onto the infernal Tuesday Taylor noggin but it simply would not go on! So I shoved the entire, tired mess under the sofa cushion, lock, stock and miniature Cruella DeVille scalp. Poor Tuesday 'is today' Taylor...she looks decidedly un-groovy --and dare I say scare-ific-- without the top of her head. :)
My new BFF, Braxton Payne, who makes the most divoon fireplace mantles, was kind enough to custom-make some 'glowing embers' for me.
My fireplace chases are only 3/4" wide, so his normal-sized embers wouldn't fit. I thought it was awfully nice of him to go to the trouble of down-sizing his embers for me. I just bought the one because I wasn't sure of the fit (and whether I would even like it or not). But now that I see it in situ, I want them in all my fireplaces!
I also got the wallpaper from Les Chinoiseries for the hallway. (see above) It looks so pretty it was well-worth the long wait --I think it must have gotten held up in customs...
I took the above photo with the lights turned off in daylight and I think it helps, don't you? (Thanks for the tip, Sophia)!
One of my blogger friends (who wishes to remain anonymous) saw that I was using my jack-o-lantern lights in the hallway, took pity on me, and sent me a whole box of Cir-Kit spotlights! (Among other goodies). I guess I'm sort of jaded, because when stuff like that happens, it kind of throws me for a loop. I just can't believe how wonderful this miniature community is! Thanks, anonymous miniature benefactor!
Here's the newly finished hallway off the back of the Music Room with the aforementioned, new lighting from my gracious benefactor. Just the effect I was going for! :)
Still haven't gotten around to piping the chairs...(sorry, Catherine)! When I bought the silk embroidery floss for the piping, I picked up several colors because I didn't have a fabric swatch on me at the time. DORK ALERT!!! Well, when I made my piping, I inadvertently used the wrong color! Pardon my blooper!
Kilmouski & Me Catherine has been sending me photography tips, too, which I so very much appreciate. (Obviously I still have a lot of work to do)! BTW, when I recently admired the floral arrangements Catherine had made and posted on her blog, a few days later the sweetest little box appeared on my porch with some of the preserved statice I had commented on...Of course I had meant to immediately whip up some fabby arrangements and post them but, well, you know how that goes. But there's another example of a 'random act of kindness' and I am currently racking my brain in hopes of reciprocating, somehow...
Well, anyway...on to the Library! The weather is really starting to turn cold here in Siberia I mean Minnesota, but you know what that means, mes chers: Dollhouse Weather!!! So now I can truly 'get busy!' I get most of my components on-line and things for the Library are starting to slowly trickle in...
Sometimes I make precisely detailed drawings of my rooms before I start them, but in this case I'm not, because I have a fairly clear 'vision' for the Library. I'm using door surrounds from Miniature Mansions as the framing for my bookcases. I'm thinking of using the same surround cut-down for an over mantle ('Adam" by non-other than my new besty, Braxton Payne,natch)! I've already ordered the wallpaper from Les Chinoiseries and hopefully it will not get held up in customs this time around...
In the meantime, I guess I'll whip out my Crazy Cords and re-do all the piping for my Music Room chairs...I've also got some new floral kits from France and the Netherlands that I could work on, because I decided my current flower arrangements simply do not make the progressively stringent Merriman Park cut. I once thought my hum-drum, clay roses were trèscharmant (when I first got them) ...but as they would say in South Boston, where I once spent the most enchanting summer of my life: "whenever I saw them paper roses from Europe, I was wickedbullshit!" (Um, for the uninitiated, that's a compliment)! LOL!
Have a wicked, awe-sum week, everybody!
CONFIDENTIAL TO FI & ILONA:
I hope this more muted color text is more to your liking! I don't want you girls tripping...
See the little hallway through the door along the back wall of my Entrance Hall? All six, stately rooms of Merriman Park have a doorway on the back wall --my way of hinting at further rooms beyond. Originally I meant to have closed, fixed doors and I only added this little passage off the Hall as an afterthought. All of a sudden I got a bee in my bonnet and decreed (to no one in particular) that ALL rooms must have this feature, so I unceremoniously yanked off my little hallway and built one, big box to serve as hallways to all six rooms!
Here's the Dining Room with it's new, glimpse of hallway. (I'm still working on the lighting back there --it still looks like the Ghost of Christmas Past is about to make an appearance)...
I have not yet received the wallpaper for the upstairs hallway, yet. But here's the decidedly un-glamorous, primed, passage off the Music Room...
I won't even bother showing you the Drawing Room hallway...it looks pretty much like the above photo, with the sad addition of all my wiring hanging down like limp spaghetti in the doorway. OH! That's the cool thing...the big, new 'hallway box' in back will eventually hide all the wiring!
As I mentioned earlier, I'm still working on the hallway lighting. I want it to look sort of muted and mysterious, with just a hint of jene sais pas quoi --and not like the aliens from Close Encounters are running a marathon up and down the damn thing. I thought maybe a simple, nightlight-type bulb would do the trick, but did you know you can't even buy a nightlight anymore that isn't on some kind of timed sensor for day/night? I know! When I was young, we turned our nightlights on and off manually AND WE LIKED IT.
Then I got this brilliant idea: I have these dumb, fake jack o'lanterns in the basement that have nightlights in them already attached to long cords...sweet!
Boo! Mr. Pumpkin smiles for the camera while Miss Tina the mannequin strikes a pose in the cellar.
Ooh, girls, when that scary pumpkin face popped up on my screen I about jumped out of my skin...spooky! Don't you just hate fake jack o' lanterns? I mean, why even bother if you're not going to carve a real one and scoop out the disgusting, slimy guts and stick a real, wax candle in there and light it and smell your house up with burnt-pumpkin stank? Seriously.
Now all I have to do is get me some clear, nightlight bulbs. Because red/orange flame-tip bulbs from fake jack o' lantern make Merriman Park look like there is some pretty funky,weird shenanigans going on in that dollhouse! LOL!
...IN OTHER NEWS...
Don't ask me why, mes chers, but I also recently decided that my newly-reupholstered, Music Room chairs simply screamed for piped edges. I've seen it used to brill effect on the blog of Catherine of Kilmouski & Me and so now my new mantra du jour has become "must have fab piping!" (In Buddhist, when I chant it correctly, darling)!
Non-other than Catherine, herself, steered me toward CRAZY CORDS, which make mini piping-making a SNAP. No more tired, twisting and turning of embroidery floss the old-fashioned, manual way...with CRAZY CORDS you just simply attach your thread into the patented, handy-dandy CRAZY CORDS tool, press the button and voila! That's right, folks --just SET it, and FORGET it!
Perfect 1:12th scale piping without the FUSS. Without the MUSS of tedious, labor-intensive spinning by HAND! But don't take my word for it, darlings...
"I would have gone CRAZY making my miniature piping without this god-send device. Thanks, CRAZY CORDS!" --Eileen Dover, Aimes, Iowa
"I've been making dollhouse piping for years, the old-fashioned way. If only I had CRAZY CORDS back in the day, I might still have the feeling and use of my thumbs..." --Mrs. Wilma Ballsdrop, Battle Creek, Michigan
"WHOO-HOO!!! We LOVE ya, CRAZY CORDS!!!" --Miss Iona Trailer & family, Columbia Heights, Minnesota
So I finished reupholstering my Thomas Jefferson chairs in the Susan Bembridge fabric and I have to say I am rather pleased with the results. Normally, I am not a 'matchy-matchy' kind of guy, but somehow in this setting it WORKS, as they're always saying on those HGTV shows.
It was a little touch-and-go with the upholstery job, mes chers, as the pattern on the fabric had to be centered on the furniture backs and seats --so there was a lot of waste. Would there be enough fabric to complete the job???
The venerable Susan Bembridge herself thought that one piece would do the job, and she was right! She even steered me toward the cotton sateen instead of the silk, which I originally favored. She told me that non-other than John Hodgsonpreferred the cotton --and who am I to argue with the likes of that? I'm actually glad I heeded her sage advice because it was tough enough to line up the pattern without the added misery of slippery silk!
I'm thinking about adding some piping to the edges of my chairs, à la manière de Catherine of Kilmouski & Me, a blog I have come to adore.
But for now...I'm calling the room 'complete!'
Here's another House of Miniatures chair I built for the piano. It's actually one of the same chairs from the Entrance Hall, but in a walnut finish and gilded detail on the lyre back.
I decided to do the seat cushion in the red silk to go with the balloon shades at the windows.
I also, one morning tossed the sheet music into my cup of coffee because it just seemed too white, lol!
I am still looking for an appropriate image to go under the spinet lid...send me one if you think it would fit the odd shape!
There are a few other details I would like to change... but isn't that the way of dollhouses?
I have another chandelier for the room in mind, but it might have to go on my Christmas list. I also have my eye on a harp.
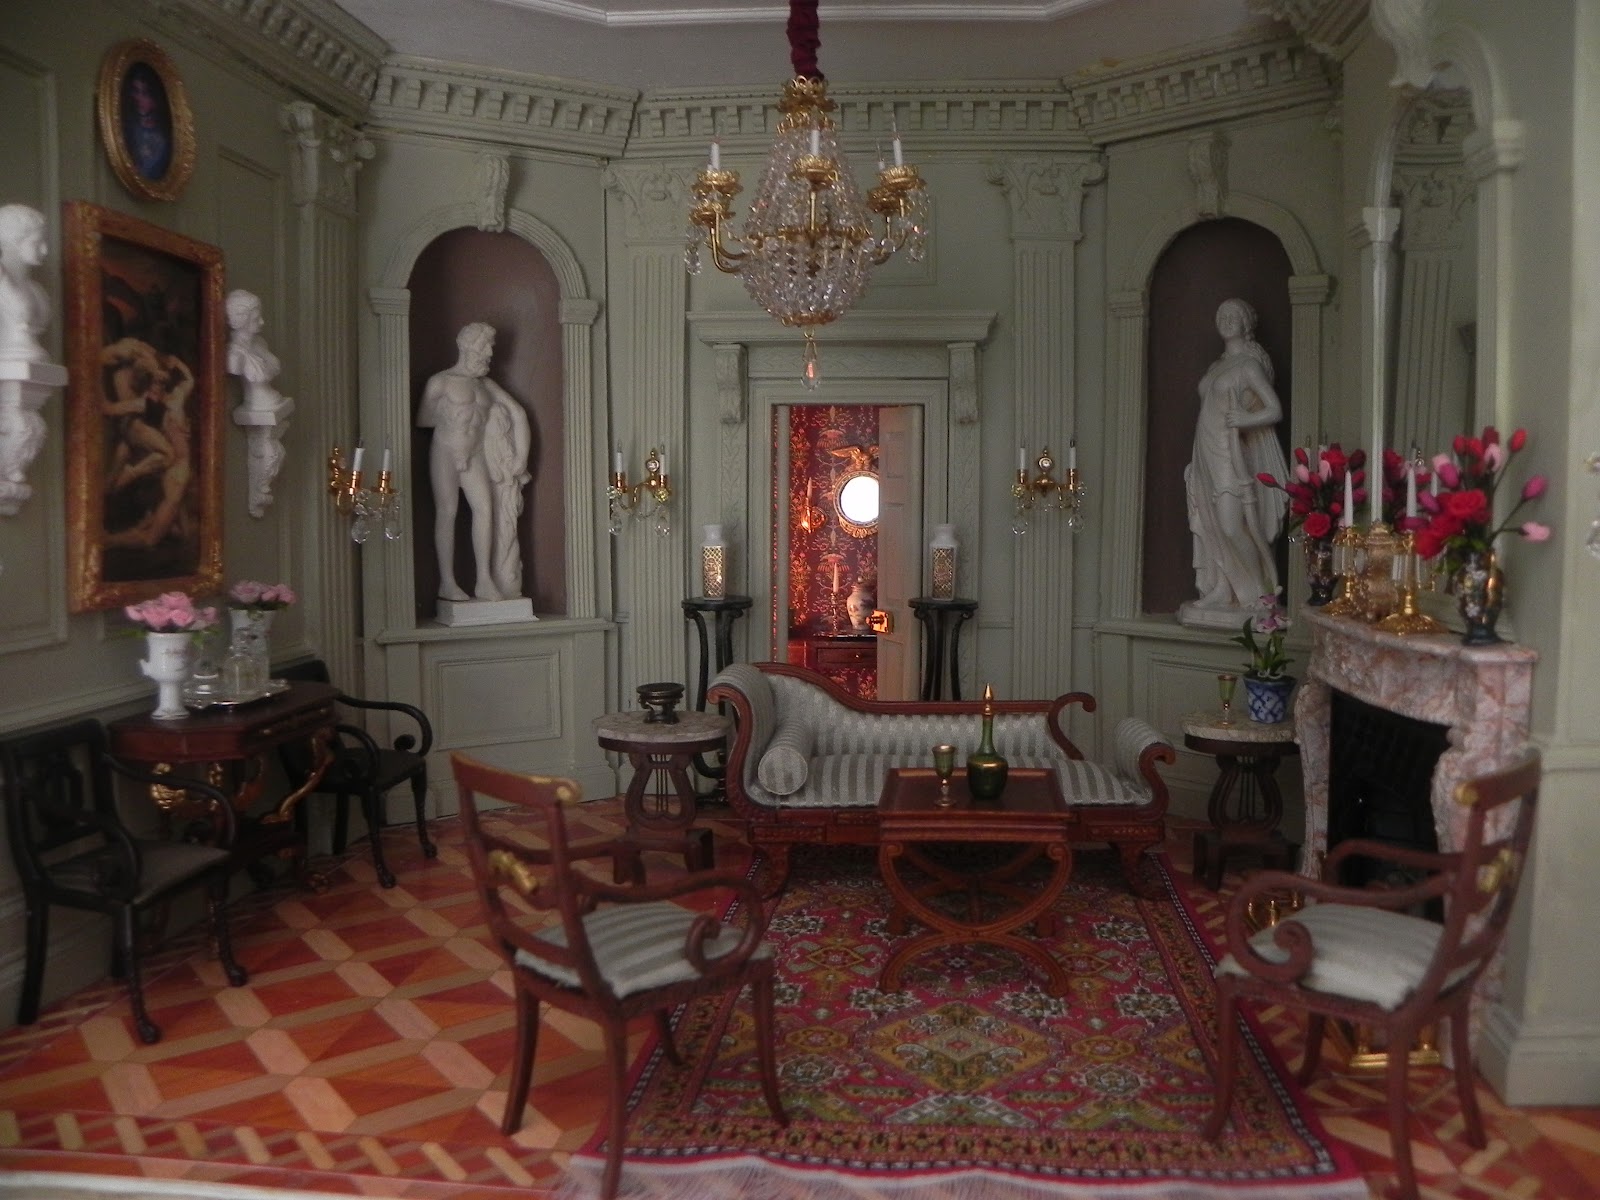
Did you notice my new, seven-tier candelabras on the tables along the back wall? They are from Patre's Dollhouse Miniatures, and I just LOVE them! Of course, what's not to love about gold and sparkles,right?The three-tiered candles in the middle ground are hers, as well.
Then there is the 'little person's chair' in the foreground...it was actually a mistake-purchase but I almost NEVER return things to stores because --well,--I don't know why... I was not planning on having any references to children in my house because I sort of have this love/hate relationship with children...and by that I mean I love to hate them, lol! I was telling Fiona the other day that I believed all children should be shipped out to Military School until they're eighteen and are able to talk intelligently about Art --but that's just silly ol' me talking, so attention must not be paid!
But I decided to include the little chair, after all, and am looking for a 1/24 scale violin to set on it...for a little, budding Mozart, perhaps? Gods! Am I getting soft in my old --in my-- in my-- as I approach middle-age?
This week my spinet piano from Master's Miniatures arrived from England --isn't it beautiful? I 'special ordered' it to be made 'mirror-reversed' so that the keyboard would face toward the front of the house.
It perfectly blends in with the other furnishings! Thanks to Andy for helping me pick it out. All I need now is to find a suitable chair or bench for it. Actually, I have a House of Miniatures chair kit left over from my Entrance Hall that I might use.
I'm toying with the idea of a classical painting on the underside of the spinet lid, something with a musical theme, perhaps?
I also received a pair of these lovely crystal-spangled candelabras, this one sitting on top of one of the aforementioned House of Miniatures side tables I made. I'm still waiting for the Susan Bembridge fabric, and suspect it will arrive any day now! I am so anxious to re-cover the chairs in it...
Here's a little violin I picked up at the local dollhouse shop, Little Enchantments. I also have my eye on a Bespaq harp, but it will have to wait for now as we had a rather large and unexpected car repair bill to deal with last week :( Don't you just hate it when RL problems interfere with your miniature projects? Oh, well, whatevs...I don't have my harp but I do have a brand-new alternator!
Just a few more little details left here and there on the Music Room and I can move on to the next room: the Library. Have a great week, everyone!
Progress on the Music Room slogs onward, ever onward...though at a snails pace! Sorry, mes chers, but it's simply too damn gaw-jess outside to be fiddling around with miniatures! Howevs, betwixt and twain heatwaves and thunderstorms I did manage to finish up a few things...
My Music Room art gallery is complete! I was told by the creator of my wallpaper, Susan Brembridge, that it simply screamedfor lots of gold frames...so I think I did OK by that, LOL...(OK I'm slightly paraphrasing. She did not actually say 'simply screamed'). ;)
I got the sconces hooked up on the fireplace. These are from Rosel's and though you can't really see them for the glare, they are quite lovely. I also added gold fringe to my balloon shades, all thanks to a tip from Jeffry. He advised me to cut one side of a ribbon off and pull out the threads to form the fringe. It worked perfectly! Thanks, Jeffry!
I built a coupleof House of Miniatures tables: one between the two square-backed chairs on the left and a candle stand against the back wall. That bare spot is where the aforementioned spinet piano is going...I hoped it would arrive this weekend, but ...alas, did not! What is really weird, though, is after I built the first candle stand , I realized I needed a second to flank the spinet, so I ordered another on ebay on Saturday, and it has already arrived, today (Monday)! From California. Say what you want about the U.S. but ourpostal system rocks! (Too bad it's going bankrupt).
BTW, those discontinued, 'ye-olde' House of Miniature kits, circa from my childhood, are still readily available, affordable and easy to put together. Great. I just drived up their price.
And here is my foot-warmer from Linda Master, the prize I won which also arrived this weekend. Isn't it scrumptious? THANK YOU, LINDA!
I actually managed to finish a few other things, but I am getting looks so I guess dinner must be ready? What? I am not a mind reader! The horses of Apollo are pawing impatiently at the Gates.
OMG! I won Linda Master's give-away prize: this intricately carved foot-warmer!
If you haven't checked out Linda's blog, Miracle Chicken, please do yourself a favor and head on over! She carves the most amazing animals and all sorts of lovely objects --like the foot warmer, above. Needless to say, I am so thrilled to have such a finely wrought addition to Merriman Park! Linda recently was inducted as a fellow into the hallowed IGMA and she has some perfectly marvelous GLT (gorgeous little things) available in her Etsy Shop.
There's just something about poof-y swags of silk --especially red silk-- that I have always admired. I just love how the light changes within the opulent folds of the fabric. And since I thought that my Music Room screamed for another touch of red, it seemed a natural choice.
Besides, I read in World of Interiors that Britain's Prince Charles had navy-blue silk balloon shades recently installed in one of his Palladian country houses (and what's good enough for His Royal Highness is certainly good enough for the likes of me)!
This style of curtain looks fussy and complicated to make, but nothing could be further from the truth. It's really only a hemmed rectangle of fabric with a curtain rod pocket at the top. The poofs are formed by simple gathering in rows. Here's how I did it:
Step 1. Determine the size of your pattern by measuring the width of your window and multiply by three. In my case the window was three inches wide x three = nine inches. Add a half inch for hems for a total of nine and a half inches.
The length of your shade is simply the measurement from the top of your window to the sill, plus one inch for rod pocket and hem. Are you still with me?
Step 2. After cutting out your fabric, use a product such as Fray Check around all four edges to lock the threads in place.
(You might want to test the Fray Check on a scrap of your curtain fabric first. On my red silk, the Fray Check turned the fabric very dark, but most of that discoloration disappeared once it dried).
Step 3. Once the Fray Check has dried a little, carefully clip the raw edges of your curtain panel 1/8 -1/16th of an inch all around.
Now your fabric edges should be locked in place, with no dangling threads.
Step 4. Press the two side seams down 1/8th of an inch or so. The iron will help the Fray Check dry completely. Press the top and bottom 1/8th inch over as well. Finally, Press the top of your panel an additional 1/2 inch to form the rod pocket.
Here's how it will look (above) and (below):
Step 5. Now it's time to sew! (NoPretty Pleater required). Start with the two 'sides' of the panels and be sure to set your machine with a very small stitch.
TIP: I found some thread that is much 'thinner' than normal and I thought this would help reduce the 'bulkiness.' It worked like a charm!
Once the sides are stitched down, proceed with the hem, and then sew closely along the rod pocket seam. Finally, top-stitch 1/8-1/4 inch along the top of the panel --this will make a nice, neat pocket for your curtain rod.
Step 6. Set your machine on a large, 'basting stitch' setting and sew along the two sides from the bottom of the rod pocket, down to the hem. Leave a long, length of thread at the bottom and do not knot it.
Divide the panel into even quarters and stitch along those lines from the bottom of the rod pocket to the hem. Leave an un-knotted length of thread here too. (viewed in the photo, above, left).
Step 7. Carefully pull the threads to form the gathers. Work slowly so you don't break the basting stitch!
(If you do, you can always go back and repeat Step 6).
This is what it will look like (left) at this point. Almost finished!
Step 8. Adjust your gathers to the desired length and tie off the basting stiches. Set your machine back to a small stitch setting and sew over the basting threads, locking the gathers in place. You can now remove the basting stitches if they show too much. Clip off any loose threads.
Step 9. Slip your curtain rod through the pocket and adjust your poofs! Be careful not to yank too hard or you risk breaking the gather stitches!
Step 10. Hang your completed shade, make the final adjustments, and enjoy your work!
I would like to add some gold fringe to the bottom hem --does anyone know of a good source?
Start to finish time: about fifteen minutes, per panel --sweet! I don't know about you, but I'm going to celebrate my new balloon shades with a smart little, refreshing summer cocktail. (Don't you love day-drinking on a lovely, summer's day)? Have a great week, everyone!
I love making things and have a huge interest in architecture --especially Renaissance, Baroque and Classical styles. This is my first dollhouse project which I intended to use as a diversion from the maddeningly long, Minnesota winters.